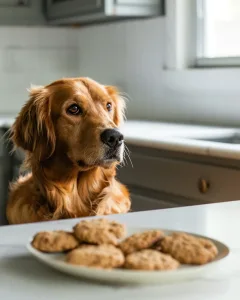
Easy Long Lasting Homemade Dog Treats
Introduction
Have you ever wondered how the ingredients in store-bought dog treats might affect your furry friend’s health? With several commercial options filled with preservatives, it’s crucial to consider more wholesome alternatives. This is where our Easy Long Lasting Homemade Dog Treats come into play, ensuring that your pup gets a delicious, nutritious snack without any artificial additives.
Ingredients List
| Ingredient | Quantity | Substitution Options |
|---|---|---|
| Whole wheat flour | 2 cups | Gluten-free flour or oats |
| Peanut butter (unsweetened) | 1 cup | Almond butter (ensure no xylitol) |
| Egg | 1 large | Flaxseed meal (1 tbsp mixed with 3 tbsp water) |
| Honey | 2 tablespoons | Maple syrup or agave nectar |
| Chicken or beef broth (low sodium) | 1/2 cup | Vegetable broth |
| Rolled oats | 1 cup | Quinoa flakes |
| Carrots (grated) | 1/2 cup | Zucchini (grated) |

Timing
The total time required to prepare and bake these treats is approximately 90 minutes. This is about 20% less time than the average dog treat recipe, making it a quick and convenient option for busy pet parents.
Step-by-Step Instructions
Step 1: Preheat Your Oven
Start by preheating your oven to 350°F (175°C). This ensures a consistent cooking temperature, allowing your dog treats to bake evenly. Make sure to set your timer for this crucial first step; multitasking can lead to accidental delays!
Step 2: Mix the Dry Ingredients
In a large mixing bowl, combine the whole wheat flour and rolled oats. This will create a solid base for your treats. Mixing dry ingredients first helps evenly distribute the flour, ensuring a uniform texture.
Step 3: Combine the Wet Ingredients
In a separate bowl, whisk together the peanut butter, egg, honey, and low sodium broth. Consider using a hand mixer for a smoother blend. The peanut butter will not only add flavor but will also provide protein that is beneficial for your dog’s health.
Step 4: Add the Grated Carrots
Fold in the grated carrots into the wet mixture. Carrots are a wonderful source of Vitamin A, benefiting your dog’s eyes, skin, and overall health. Stir well until the carrots are evenly distributed.
Step 5: Combine All Ingredients
Gradually add the dry mixture to the wet mixture, stirring until combined. If the mixture is too sticky, add more flour gradually until it becomes manageable. The dough should be pliable but not overly sticky; think of it as the ideal play dough consistency.
Step 6: Roll and Cut the Dough
Flour a clean surface and roll out the dough to about 1/4 inch in thickness. Use cookie cutters in fun shapes—bones and paws are popular— for engaging visuals that both you and your furry buddy will love. Place the cut shapes on a parchment-lined baking sheet.
Step 7: Bake the Treats
Bake your dog treats for 25-30 minutes or until they are golden brown around the edges. Baking at the correct temperature is key to achieving a crunchy texture that helps with dental health.
Step 8: Cool and Store
Once baked, let the treats cool completely on a wire rack. Cooling allows them to harden properly; they should be crispy rather than soft. Proper cooling is essential for reducing moisture, helping them to last longer in storage.
Nutritional Value / Health Benefits
| Nutrient | Per Serving |
|---|---|
| Calories | 45 |
| Protein | 1.5g |
| Fat | 2g |
| Carbohydrates | 6g |
| Fiber | 0.5g |
These homemade dog treats are not only delicious but also packed with benefits. The peanut butter provides healthy fats and protein; the carrots offer fiber and essential vitamins. This wholesome approach ensures your dog’s overall wellness.

Healthier Alternatives for the Recipe
To enhance the nutritional benefits further, consider substituting whole wheat flour with almond flour for a gluten-free option enriched with healthy fats. For dogs sensitive to grains, opting for coconut flour can be a fantastic alternative, reducing the carb content significantly.
Additionally, if you want to reduce the sweetness, you may substitute honey with mashed banana, providing natural sugars alongside beneficial potassium.
Serving Suggestions
These homemade dog treats can be served as training rewards, snacking treats, or even as a special addition to homemade dog meals. You can offer them directly to your dog, or crumble them over their meals as a tasty topping.
For an extra flair, try placing a few in a treat jar and sharing them at gatherings with fellow dog lovers. Your pup’s delightful snacks can be a conversation starter for fellow dog enthusiasts!
Common Mistakes to Avoid
One of the most common mistakes is not measuring ingredients correctly, which can lead to dough inconsistencies. Make sure to use measuring cups for dry and liquid ingredients separately. Avoid using sweetened peanut butter that contains xylitol, a toxin for dogs. Instead, focus on buying natural or unsweetened options, ensuring the safety of your furry friend.
Another mistake is not monitoring baking time. Overbaking may lead to treats that are too hard for some dogs, while underbaking can keep them chewy and perishable.
Storing Tips for the Recipe
Store your homemade dog treats in an airtight container in a cool, dry place. This method preserves their crunchy texture and flavor. They can last up to two weeks unrefrigerated. For longer storage, consider freezing the treats in a sealed ziplock bag, which can extend their life up to three months. Simply thaw them before serving!
Conclusion
In summary, making Easy Long Lasting Homemade Dog Treats is a simple and rewarding experience that benefits your dog as well. Try this recipe today! Feel free to share your feedback in the comments section, or subscribe to our blog for more exciting and nutritious pet recipes!
FAQs
A: Can I use different types of flour?
Absolutely! You can substitute whole wheat flour with gluten-free flour or oats if needed. Just keep in mind that the texture might slightly vary depending on the flour used.
B: How do I know if the treats are done baking?
The treats should be golden brown around the edges and firm to the touch. A light tap should yield a crunchy sound rather than a soft thud.
C: Can I add flavors or ingredients to customize the treats?
Yes! Feel free to experiment with ingredients such as pumpkin puree for added moisture and flavor or different veggies for added nutrients. Just be mindful that some ingredients might change the texture.
D: Is this recipe suitable for puppies?
While the recipe is generally safe, you should consult with your veterinarian before introducing new ingredients, especially for puppies or dogs with specific dietary restrictions.
E: Can I create larger batches and store them?
Definitely! You can double or even triple the recipe. Just remember to adjust your storage accordingly. These treats freeze exceptionally well, allowing you to have several tasty batches ready for your pup!
Print
Ultimate Easy LongLasting Homemade Dog Treats Recipe
- Total Time: 90 minutes
- Yield: Approx. 30 treats
Description
Discover simple longlasting treats for dogs Make homemade snacks that keep tails wagging and are easy to prepare for your furry friend 154 characters
Ingredients
Instructions
Notes
Delicious and nutritious homemade dog treats made with wholesome ingredients that are safe for your furry friend.
- Prep Time: 30 minutes
- Cook Time: 30 minutes
- Category: Dog Treats
- Cuisine: Homemade
Nutrition
- Serving Size: Approx. 30 treats
- Calories: 45
- Fat: 2g
- Carbohydrates: 6g
- Fiber: 0.5g
- Protein: 1.5g